


Arduino SPI SD Memory Shield
SD card is often used as a storage device such as in a digital camera, MP3 or GPS navigators. We can also use SD card to record the date when using Arduino. However, it’s not easy to let SD card and Arduino work together. The hardware connection is the first problem, then comes the software problems to read the data by other devices.
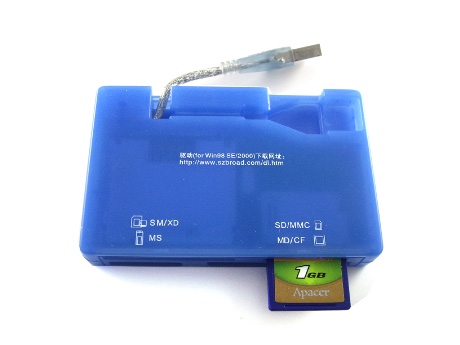
According to the demand of hardware, we have developed SD card module, it communicate with Arduino through the SPI interface:
.jpg)
At the same time, to connect the SPI interface with Arduino, We provide IDC expanded board. which has a six-core socket special designed for SPI :
.jpg)
The circuit connection is “plug and play”. It uses six-core IDC connection wire to connect SPI socket on IDC board to the corresponding socket on SD card modules.
.jpg)
As to software, our goal is to make the data recorded in SD card be able to read on computers, So we need to follow certain rules to record the data to SD card, namely the file system type. As Arduino system is simple, FAT16 is a good choice.
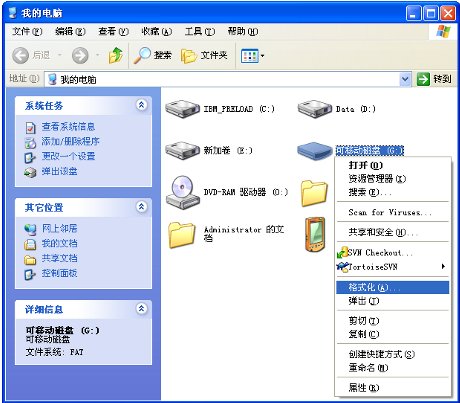
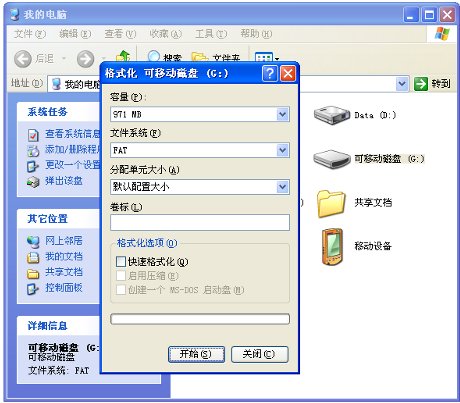
Here we will use for SD card reader to make corresponding processing, It will be formatted into FAT file system:
The software used on Arduino is based on the library from SparkFun, but modified according to the difference of hardware. You can downloaded the modified FAT here. The library needs be uncompressed into “hardwarelibraries” subdirectory.
Use the sample programme of FAT repository to test :
//Include all the libraries necessary for FAT32
#include <byteordering.h>
#include <fat.h>
#include <FAT16.h>
#include <fat_config.h>
#include <partition.h>
#include <partition_config.h>
#include <sd-reader_config.h>
#include <sd_raw.h>
#include <sd_raw_config.h>
FAT TestFile; //This will be the file we manipulate in the sketch
char buffer[512]; //Data will be temporarily stored to this buffer before being written to the file
int read_size=0; //Used as an indicator for how many characters are read from the file
int count=0; //Miscellaneous variable
void setup()
{
Serial.begin(9600); //Initiate serial communication at 9600 bps
TestFile.initialize(); //Initialize the SD card and the FAT file system.
Serial.println("Starting...");
TestFile.create_file("Sample.txt"); //Create a file on the SD card named "Read_File_Test.txt"
//NOTE: This function will return a 0 value if it was unable to create the file.
TestFile.open(); //Now that the file has been created, open it so we can write to it.
}
void loop()
{
TestFile.write("This is test data."); //using the write function will always write to the beginning of the file.
// Here we add some text to the file.
TestFile.close(); //We are done writing to the file for now. Close it for later use.
while(1){
TestFile.open(); //Open the file. When the file is opened we will be looking at the beginning of the file.
read_size=TestFile.read(buffer); //Read the contents of the file. This will only read the amount of data specified
// by the size of 'buffer.'
Serial.println(read_size, DEC); //Print the number of characters read by the read function.
for(int i=0; iSerial.print(buffer[i], BYTE); //Print out the contents of the buffer.
}
Serial.println();
sprintf(buffer, "%d", count++); //Now we'll use the buffer to write data back to the file.
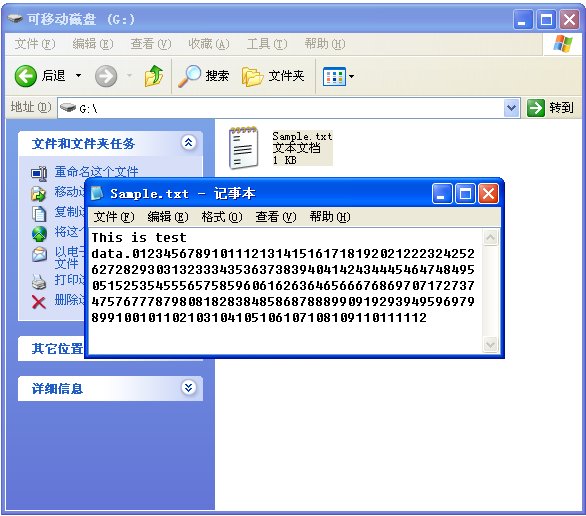
Arduino will record datd to “Sample.text” in the SD card. Then we can also read the data through card reader.
Please note that as the code used by SD card and file system is a little much, at present this modules can only work with Arduino of ATmega328P. In addition, there are many SD cards in the market at present. Some may not be compatible, The following are those passed compatibility test:
* SanDisk 2GB SD2 Card
* Apacer 60X 1GB SD Card
The following don’t pass compatibility test:
SD Card SanDisk * 16 MB
Related Items
-
 US$1.98
 -
 US$4.58
 -
 US$14.58
 -
 US$9.98
 -
 US$43.98
 -
 US$23.98
 -
 US$15.98
 -
 US$19.98
Join our newsletter today, to get latest product information and promotion code.
 |
 |
|

|